Monday, July 24, 2023

Installing SQL Server Express LocalDB in a GitHub Workflow

In this post, let's see how you can install SQL Server Express LocalDB in GitHub Workflows. This is useful when you want to run integration tests in a Workflow. 

Technically you can use this approach anywhere as long as the Agent is Windows, as this is just a set of PowerShell commands.

name: Build and deploy

on:
  push:
    branches:
      - main
  workflow_dispatch:

jobs:
  build:
    runs-on: windows-latest

    steps:
      - uses: actions/checkout@v2

      - ...

      - name: Install MSSQLLocalDB
        run: |
            Import-Module BitsTransfer
            Start-BitsTransfer `
               -Source https://download.microsoft.com/download/3/8/d/38de7036-2433-4207-8eae-06e247e17b25/SqlLocalDB.msi `
               -Destination SqlLocalDB.msi
            Start-Process `
               -FilePath "SqlLocalDB.msi" `
               -ArgumentList "/qn", "/norestart", "/l*v SqlLocalDBInstall.log", "IACCEPTSQLLOCALDBLICENSETERMS=YES"; `
               -Wait
            sqlcmd -l 60 -S "(LocalDb)\MSSQLLocalDB" -Q "SELECT @@VERSION;"
First, we are importing the BITS (Background Intelligent Transfer Management) module, and downloading the  SqlLocalDB.msi. Then we are doing a silent install and the last command is to test the connectivity to the instance.

The specified link for SqlLocalDB.msi is for SQL Server 2022. If you want to use SQL Server 2019, you can this link: https://download.microsoft.com/download/7/c/1/7c14e92e-bdcb-4f89-b7cf-93543e7112d1/SqlLocalDB.msi

Hope this helps.

Happy Coding.

Regards,
Jaliya

Monday, July 17, 2023

C# 12.0 Preview: Access Instance Members within nameof

In this post, let's go through a new feature that's coming with C# 12.0. With this feature, you can access instance members within nameof.

To try this feature out, make sure you have the latest version of .NET SDK (>= 8.0.0-preview.6) installed and the <LangVersion> is set to preview.
<Project Sdk="Microsoft.NET.Sdk">

  <PropertyGroup>
    ...
    <LangVersion>preview</LangVersion>
  </PropertyGroup>

</Project>
Let's consider the following example.
using System.ComponentModel;

Console.WriteLine(nameof(NameOfHelper.StaticInteger.MinValue));

internal class NameOfHelper
{
    public string MyString { get; } = "SomeValue";

    public static int StaticInteger;
    public string NameOfLength { get; } = nameof(MyString.Length);

    [Description($"Returns {nameof(MyString.Length)} of given String")]
    public int StringLength(string s) => s.Length;
}
With the above code, if we use a C# <LangVersion> prior to 12.0, we will get compile errors when using these nameof expressions. Because we are using nameof to access instance members.

But with C# 12.0, it would build just build fine.
nameof()
Check out more C# 12 features:

Happy Coding.

Regards,
Jaliya

Friday, July 14, 2023

Azure PowerShell: Check Directory Exists in Azure File Share

In this post, let's see how to check whether a Directory exists in Azure File Share using Azure PowerShell.

I am assuming you have connected to Azure with an authenticated account and have chosen the subscription in which your storage account resides by running the following commands.
Connect-AzAccount
Set-AzContext -Subscription "<SubscriptionId>"
Now first let's get a reference to the File Share.
$ResourceGroup = "<ResourceGroup>"
$StorageAccountName = "<StorageAccountName>"
$StorageFileShareName = "<StorageFileShareName>"

# Get Storage Account Key
$storageAccountKey = (Get-AzStorageAccountKey `
    -ResourceGroupName $ResourceGroup `
    -AccountName $StorageAccountName).Value[0]

# Set AzStorageContext
$storageContext = New-AzStorageContext `
    -StorageAccountName $StorageAccountName `
    -StorageAccountKey $storageAccountKey

# Get the FileShare
$storageFileShare = Get-AzStorageShare `
    -Name $StorageFileShareName `
    -Context $storageContext
Here Get-AzStorageShare cmdlet returns an AzureStorageFileShare. On that, we have this nice ShareClient property. And we can use that for basically all types of operations. In this case, we need to check whether a Directory exists, so we can do something like below.
if ($storageFileShare.ShareClient.GetRootDirectoryClient().GetSubdirectoryClient("parent-directory").Exists().Value)
{
    # Directory Exists
} else {
    # Directory does not exist
}
Here I am getting to the root of the File Share, getting to the directory of my choice, and checking whether it exists. You can even pass nested paths for the directoryName, something like "parent-directory/child-directory".

This is really neat.

Hope this helps.

Happy Coding.

Regards,
Jaliya

Friday, July 7, 2023

Received Microsoft MVP Award in Developer Technologies

I am humbled and honored once again to receive the precious Microsoft Most Valuable Professional (MVP) Award for the 10th consecutive year.

This year, the announcement of new MVPs took a bit longer (usually it's on 07/01), but finally got the email.

As always looking forward to another great year on top of Microsoft Development Stack.
Microsoft Most Valuable Professional (MVP)
Thank you Microsoft for your appreciation and Thank you everyone for your continuous support.

Happy Coding.

Regards,
Jaliya

Saturday, July 1, 2023

Connecting to Azure Cache for Redis Instance from RedisInsight

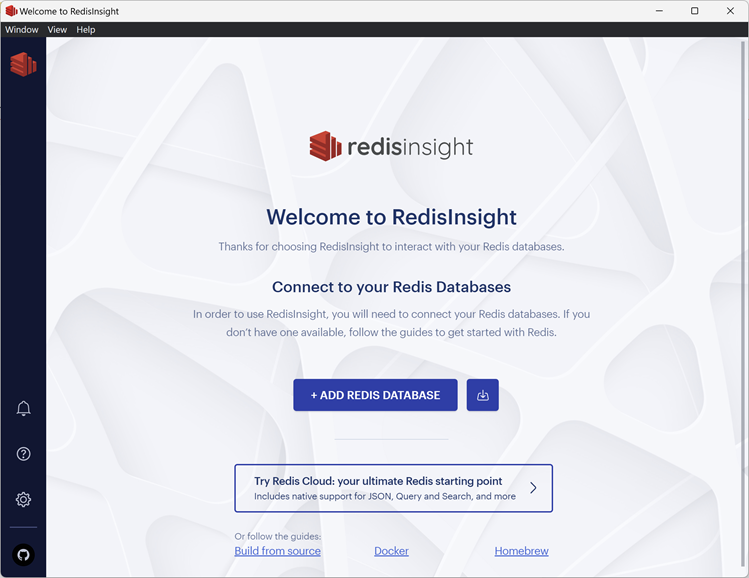
In this post, let's see how we can connect to Azure Cache for Redis Instance from RedisInsightRedisInsight is a free tool that provides an intuitive and efficient UI for Redis and Redis Stack and supports CLI interaction in a fully-featured desktop UI client.

RedisInsight
In Azure, I have created an Azure Cache for Redis Instance (with a Public Endpoint for simplicity) and copied the connecting string which is as follows.

<my-instance-name>.redis.cache.windows.net:6380,password=<some-password>,ssl=True,abortConnect=False

Now let's start.

The first step is, of course, from RedisInsight click on ADD REDIS DATABASE. And then fill in the wizard as follows.

Configure Database Connection

You need to fill up the following,

  • Host
  • Port
  • Database Alias (this can be anything)
  • Password
  • Use TLS
And then do a Test Connection. It should come up as follows.
Test Connection
After verifying the connection, click on Add Redis Database.
My Redis databases
Once it's added, click on the database. Now you can easily visualize the data in your Redis Database as well as you have a CLI at your disposal.
Data Visualizer & CLI
Hope this helps.

Download RedisInsight today.

Regards,
Jaliya