In this post, let's have a look at a nice feature that's now available with
Azure Functions. That is being able to expose HTTP trigger functions via an
Open API specification endpoint.
Let's go with an example. I already have an
In-Process .NET Azure Function created with a single HTTP Trigger
function.
The first step to enable Open API specification is to install the following
NuGet package.
dotnet add package Microsoft.Azure.WebJobs.Extensions.OpenApi -v 1.0.0
Once that is done, if we run the Function App locally, we should be seeing
something interesting.
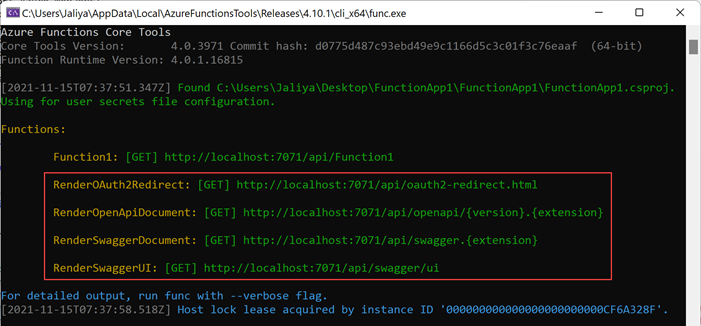 |
| Additional Endpoints |
Suddenly we have 4 new endpoints. If I navigated to the SwaggerUI endpoint,
I can see this.
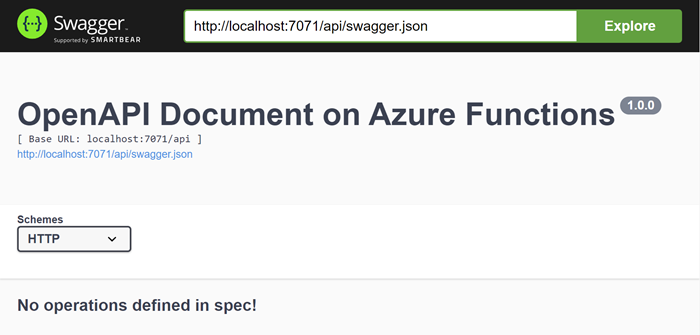 |
| OpenAPI Document |
That looks good. Now we just need to decorate the function to enrich the OpenAPI specification.
using Microsoft.AspNetCore.Http;
using Microsoft.AspNetCore.Mvc;
using Microsoft.Azure.WebJobs;
using Microsoft.Azure.WebJobs.Extensions.Http;
using Microsoft.Azure.WebJobs.Extensions.OpenApi.Core.Attributes;
using Microsoft.Azure.WebJobs.Extensions.OpenApi.Core.Enums;
using Microsoft.Extensions.Logging;
using Microsoft.OpenApi.Models;
using System.Net;

namespace FunctionApp1;

public static class Function1
{
    [FunctionName("Function1")]
    [OpenApiOperation(operationId: "Run", tags: new[] { "GETTERS" })]
    [OpenApiSecurity("function_key", SecuritySchemeType.ApiKey, Name = "code", In = OpenApiSecurityLocationType.Query)]
    [OpenApiParameter(name: "name",
        In = ParameterLocation.Query,
        Required = true,
        Type = typeof(string),
        Description = "The **Name** parameter")]
    [OpenApiResponseWithBody(statusCode: HttpStatusCode.OK,
        contentType: "text/plain",
        bodyType: typeof(string),
        Description = "The OK response")]
    public static IActionResult Run(
        [HttpTrigger(AuthorizationLevel.Function, "get")] HttpRequest req,
        ILogger log)
    {
        string name = req.Query["name"];

        string responseMessage = $"Hello, {name}. This HTTP triggered function executed successfully.";

        return new OkObjectResult(responseMessage);
    }
}
And now if I run the function app, I should be seeing my HTTP Trigger
function.
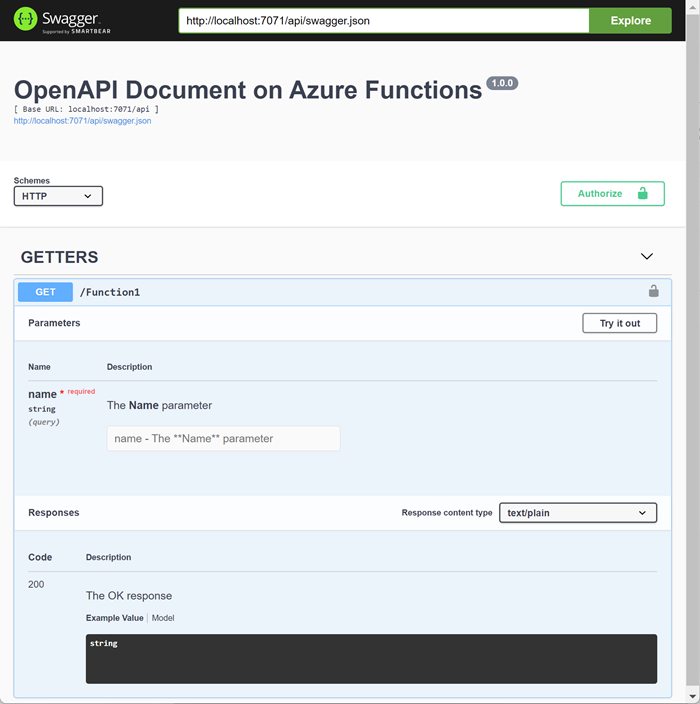 |
| OpenAPI Document |
That looks nice. I can test my function from the Swagger UI itself.
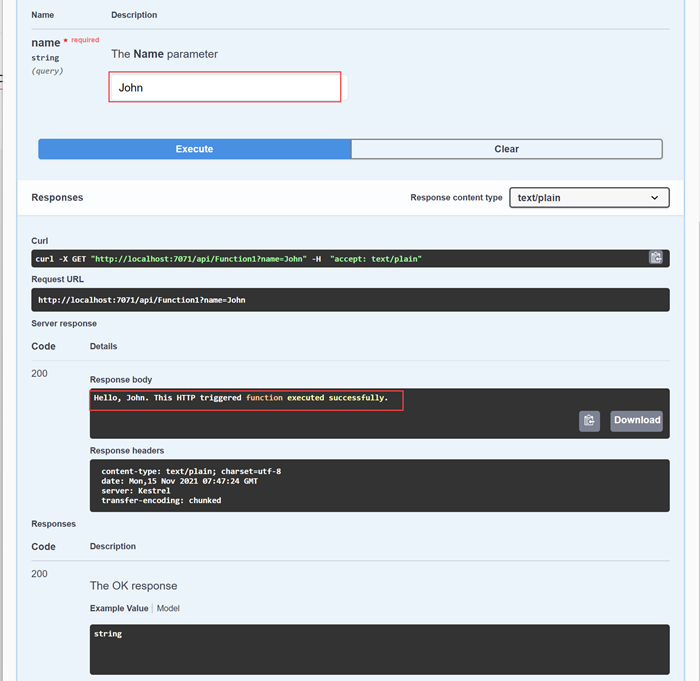 |
| OpenAPI Document |
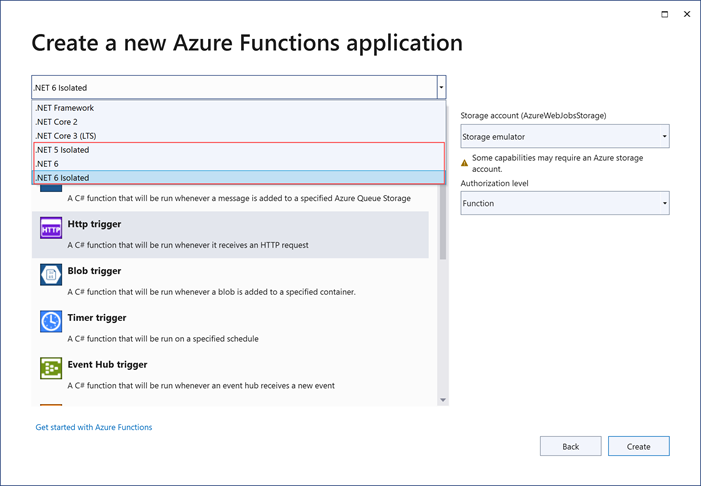
That's quite nice, isn't it? With
Visual Studio 2022, you can get
yourself a head start by using this template.
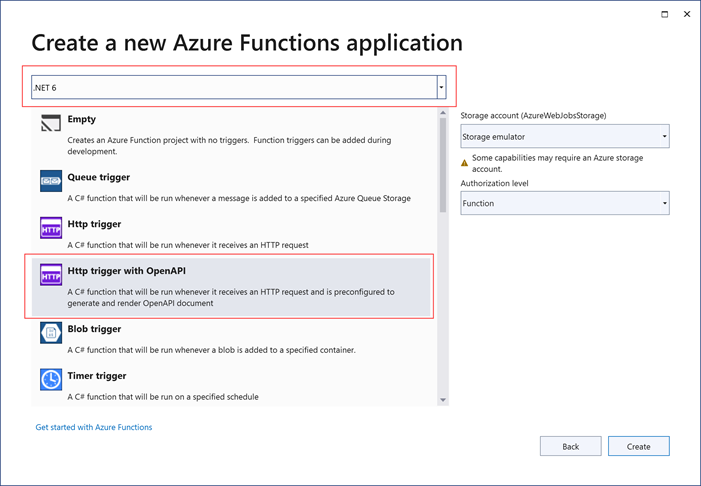 |
| .NET 6 (In-Process) - Http trigget with OpenAPI |
That was enabling OpenAPI specification for
In-Process .NET Functions.
If you want to enable Open API specification for
Isolated (Out-of-process) .NET Azure Functions, you need to install the following NuGet package.
dotnet add package Microsoft.Azure.Functions.Worker.Extensions.OpenApi -v 1.0.0
Once that's done, you need to update the Program.cs as follows.
Program.cs
using Microsoft.Azure.Functions.Worker.Extensions.OpenApi.Extensions;
using Microsoft.Extensions.Hosting;

namespace FunctionApp3;

public class Program
{
    public static void Main()
    {
        IHost host = new HostBuilder()
            .ConfigureFunctionsWorkerDefaults(worker => worker.UseNewtonsoftJson())
            .ConfigureOpenApi()
            .Build();

        host.Run();
    }
}
And then decorate the Functions the same way as in In-Process model.
using Microsoft.Azure.Functions.Worker;
using Microsoft.Azure.Functions.Worker.Http;
using Microsoft.Azure.WebJobs.Extensions.OpenApi.Core.Attributes;
using Microsoft.Azure.WebJobs.Extensions.OpenApi.Core.Enums;
using Microsoft.Extensions.Logging;
using Microsoft.OpenApi.Models;
using System.Collections.Specialized;
using System.Net;
using System.Web;

namespace FunctionApp3;

public class Function1
{
    private readonly ILogger _logger;

    public Function1(ILoggerFactory loggerFactory)
    {
        _logger = loggerFactory.CreateLogger<Function1>();
    }

    [Function("Function1-Isolated")]
    [OpenApiOperation(operationId: "Run", tags: new[] { "GETTERS" })]
    [OpenApiSecurity("function_key", SecuritySchemeType.ApiKey, Name = "code", In = OpenApiSecurityLocationType.Query)]
    [OpenApiParameter(name: "name",
        In = ParameterLocation.Query,
        Required = true,
        Type = typeof(string),
        Description = "The **Name** parameter")]
    [OpenApiResponseWithBody(statusCode: HttpStatusCode.OK,
        contentType: "text/plain",
        bodyType: typeof(string),
        Description = "The OK response")]
    public HttpResponseData Run([HttpTrigger(AuthorizationLevel.Function, "get")] HttpRequestData req)
    {
        NameValueCollection query = HttpUtility.ParseQueryString(req.Url.Query);
        string name = query["name"];

        HttpResponseData response = req.CreateResponse(HttpStatusCode.OK);
        response.Headers.Add("Content-Type", "text/plain; charset=utf-8");

        string responseMessage = $"Hello, {name}. This HTTP triggered function executed successfully.";

        response.WriteString(responseMessage);

        return response;
    }
}
That's about it. Now if we run this, it should be working the same way as in
In-Process mode.
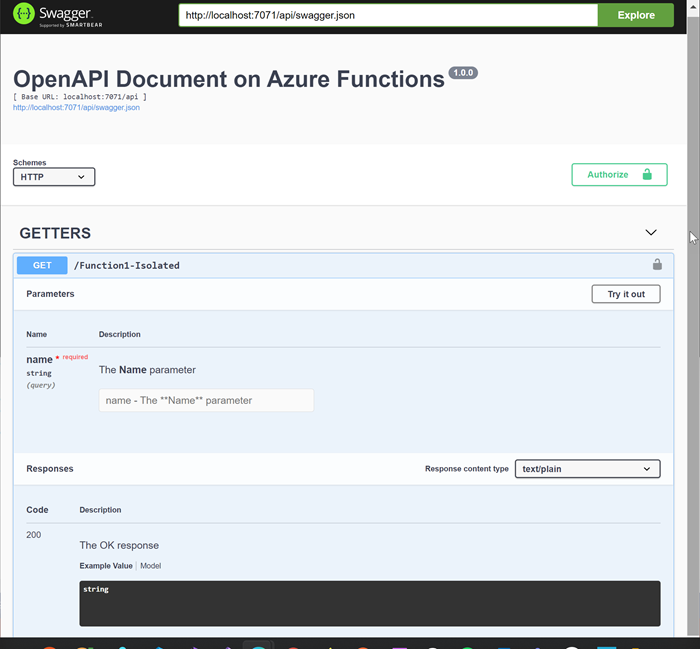 |
| OpenAPI Document |
Hope this helps.
Happy Coding.
Regards.
Jaliya