Sunday, April 28, 2019

Global Azure Bootcamp 2019 - Auckland, New Zealand

I was fortunate enough to support Global Azure Bootcamp 2019 - Auckland, New Zealand.

Global Azure Bootcamp is a worldwide event happening on every year, and this time the day was April 27, 2019. The entire day was filled with great sessions delivered by industry experts from a variety of areas. 
Global Azure Bootcamp 2019 - Auckland, New Zealand - Speakers

I couldn't deliver a session but managed to support the event at least. 
Support Team
Happy Coding.

Regards,
Jaliya

Wednesday, April 3, 2019

Live Share in Visual Studio 2019

Finally, Visual Studio 2019 is released and one of the nice features which is generally available now with Visual Studio 2019 is Live Share.

Live Share makes it possible to share the code that you are working on right now and collaborate with fellow developers without using a separate tool. In this post, let's see how we can use Live Share.

I have some solution opened in Visual Studio 2019. There you should be able to notice this new button titled Live Share located at the top right corner.
Live Share
Once you click on that, you will see a prompt saying Visual Studio will now initiate the Live Share and your firewall will prompt to grant access to required ports. Once that is done, you will see the title of the button changed to Sharing and a link will be copied to your clipboard. 
Sharing
You just need to share the link with the other user. Once he/she has the link, he/she need to open up the link in a browser.
Open Sharing
Now I am switching to my other machine and have Visual Studio 2019 installed there.

As soon as I navigate to the link from a browser, I am prompted to open the link in an application. Here the possible applications are either Visual Studio 2019 or Visual Studio Code. I am selecting Visual Studio.

Now the shared solution will get opened in Visual Studio and it's just like I have the original solution running in my machine. I can see when the other person is highlighting the code, when he is doing any changes etc, it's almost instantaneous. I can also see the email of the other user at the cursor point. So imagine there are many users connected to the session, I will see who is doing what.
Sharing
And if I switch back to the machine which I initiated sharing, you can also share the terminal with participants in Read-Only or Read/Write mode.
Options
And finally, you can end the Live Share session, and your participants will get notified.
Session Ended
Once the sharing session is ended, your participants will no longer have access to the solution.

This is a really handy feature. Do try it out.

Happy Coding.

Regards,
Jaliya

Tuesday, April 2, 2019

.NET Core Worker Services

With .NET Core 3.0, you can create long running services as background services. With .NET Core 3.0.100-preview3, a new template is introduced named Worker Service. These services can be used to do things like processing messages in a queue, as a watcher etc.

In this post, let's see how we can get started on creating a Worker Service. For this you will need to have Visual Studio 2019 and .NET Core 3.0.100-preview3 installed in your machine. Remember to use .NET Core 3.0 with Visual Studio, you'll anyway need Visual Studio 2019 (By the way, Visual Studio 2019 RTM is getting released today, which I am very excited about).

Once those are installed, you can create a new ASP.NET Core Web Application. If you are wondering why do you need to create a Web Application, the reason is, currently the Worker template is sitting inside Web Application template and this is going to get changed in the future. The Worker Service template will be available directly inside the create new project wizard.

ASP.NET Core Web Application
Configure your new project
After giving the solution and project name, in the next dialog, you can see the Worker Service template. Make sure you have selected .NET Core and ASP.NET Core 3.0 as the target framework.

Worker Service Template
When the project is created, you can see two classes are created, first one is the familiar Program.

Program.cs
public class Program
{
    public static void Main(string[] args)
    {
        CreateHostBuilder(args).Build().Run();
    }
 
    public static IHostBuilder CreateHostBuilder(string[] args) =>
        Host.CreateDefaultBuilder(args)
            .ConfigureServices(services =>
            {
                services.AddHostedService<Worker>();
            });
}
This is similar to what we used to in ASP.NET Core Web Applications, instead it directly configures services adding a service of any type which implements IHostedService. Here it's a type of a Worker.

Worker.cs
public class Worker : BackgroundService
{
    private readonly ILogger<Worker> _logger;
 
    public Worker(ILogger<Workerlogger)
    {
        _logger = logger;
    }
 
    protected override async Task ExecuteAsync(CancellationToken stoppingToken)
    {
        while (!stoppingToken.IsCancellationRequested)
        {
            _logger.LogInformation($"Worker running at: {DateTime.Now}");
            await Task.Delay(1000, stoppingToken);
        }
    }
}
Worker implementing an abstract class BackgroundService which in turn implements IHostedService. Now if you run this, the message will get displayed until we issue an cancellation token, for instance until you press Ctrl + C etc.

Now you can use this to create a Windows Service or to use as a Linux Daemon with some very little changes.

Hope this helps.

Happy Coding.

Regards,
Jaliya

Monday, April 1, 2019

Running SQL Server Insider a Docker Container

Most of the time when we are working with an application which connects to a Microsoft SQL Server database, we usually have Microsoft SQL Server installed in the local machine and have our test database/s there and doing our testing against that.

With SQL Server containers you can avoid the installation and you can set up a SQL Server in a matter of minutes.

In this post, let’s see how we can setup SQL Server 2019 inside a Docker container. As of today, the latest SQL Server 2019 image is CTP 2.4.

First, make sure docker daemon is running in your machine. I am on Windows and it’s making sure Docker Desktop is running.

Now pull up the image from MCR (Microsoft Container Registry). If you are not aware that Microsoft has started maintaining its own container registry (like Docker Hub) and has started serving container images from there. You can find more information on that from this blog post: Microsoft syndicates container catalog).

I am using PowerShell.
docker pull mcr.microsoft.com/mssql/server:2019-CTP2.4-ubuntu
Once the command is completed, you can run the following command to make sure the image is present.
docker images
docker images
Next, before starting a container from this image, you need to accept end user license and setup a sa password. You can do all this and start up a container by below command.
docker run -e 'ACCEPT_EULA=Y' -e 'SA_PASSWORD=1qaz!QAZ@' -p 1433:1433 --name sql2019 -d mcr.microsoft.com/mssql/server:2019-CTP2.4-ubuntu
After that if you check on running containers, you should see our sql2019 container is running.
docker ps -a
Now you have a container which has SQL Server is running. Next thing you might want is to try the connectivity.

In this post I am using Microsoft SQL Server Management Studio (SSMS). I just need to get the local IP address of my machine and use it as the server name, use SQL Server Authentication and use sa credentials.
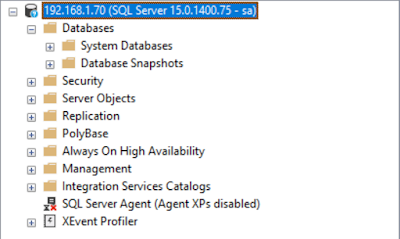
SSMS - Connected
It should get connected without any issues. Now if you want to restore a database, you can use either SSMS or sqlcmd. For this post, I will use SSMS.

When I try to select a .bak file, of course, it’s empty.
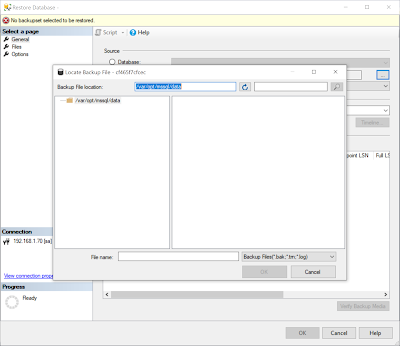
Locate Backup File
I can easily copy the file I want using docker cp command.
docker cp C:\Users\Jaliya\Desktop\WideWorldImporters-Full.bak <containerId>:/var/opt/mssql/data
Once the command completed, if I refresh the Locate Backup File dialog, I can see the copied file there. And from there I can select the file and do the restoration.

A couple of important things,
  • You can stop the container (in this case: docker stop sql2019) and start (docker start sql2019) it later without losing the changes in SQL Server Configuration and your databases.
  • But if you remove the container by doing a docker rm, everything in the container is deleted, including your databases.
That’s pretty neat, isn’t it. Hope this helps.

Happy Coding.

Regards,
Jaliya

Visual C# and ASP.NET Technical Guru - February 2019

Another month as a judge in Microsoft TechNet Guru Awards. And this it’s under both Visual C# and ASP.NET category. The TechNet Guru Awards celebrate the technical articles on Microsoft TechNet.

Post in WikiNinjas Official Blog,
Visual C# Technical Guru - February 2019
Well, this time under Visual C# there were not many articles as it was used to be. Got into judging ASP.NET Category as well.
ASP.NET Technical Guru - February 2019
Happy Coding.

Regards,
Jaliya